Mountain biker uses brush to clean the dust off the chain of his bike.

How To Take Care of Your Bike

Photo: Matt Jones Photography/Tandemstock

Whether it’s miles you’ve put into it, or seasons that it’s been neglected in the garage for longer than you’d care to admit, your bike might need some TLC.

Sure, you can take it to a shop, but depending on the season, there might be significant service delays until you can ride again. On top of that, you’ll have to pay, of course. With a bit of know-how, though, you can tackle many common bike maintenance issues to ensure it rolls for the season ahead, giving you a smoother, more comfortable, and reliable ride. Here are some basic maintenance guidelines and tips. 

DO: Check Your Tires

It sounds simple, but just like in your car, a properly inflated tire will keep you running smoothly and help prevent flats or damage to your tire. Check your tire’s sidewall for the proper PSI recommendation and use a floor pump with a pressure gauge to get the perfect fill.

DON’T: Ride a Dirty Bike

Grit and dirt can wear out the components of your bike and work their way into sensitive systems like your handlebar shifters and derailleurs. Any other maintenance or adjustments you do on your bike will be largely worthless if they are made while your bike is dirty. A clean bike performs best and will work most reliably. After messy rides, spray and wipe dirt and grime off your bike, and regularly give your bike a deep cleaning, especially on your chain. 

DO: Clean Your Chain

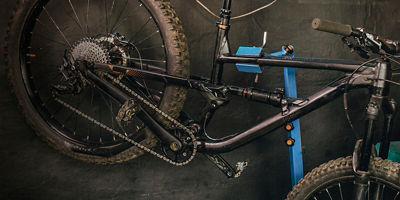
Again, a clean bike works best—especially as your chain can quickly become one of the dirtiest parts of your bike. Spray your chain, cassette, and chain ring off with degreaser, then backpedal your bike while scrubbing at the chain, cassette, and chainring with a brush, even a toothbrush will work. Wipe off your chain with a rag by backpedaling and lightly grabbing the chain with the rag. Then, apply a drop of lube to every link of the chain while backpedaling. Finally, run a clean section of your rag over your chain as you backpedal to remove excess lube. 

DON’T: Let Things Rub

Properly lubricating your bike will keep it lasting for years to come. Put bike grease on all threaded pieces of your bike, like your pedal threads and your tire axle threads. Also grease the section of your seatpost that slides into the seat tube. If your bike is carbon, use carbon paste for the parts, like your seat tube and seatpost, that touch each other. 

DO: Tighten Bolts

Over the course of your riding, it's inevitable that some bolts will loosen. Regularly check important bolts, like those on your handlebars, or seat post, to ensure that they are tight. If you hear a rattle, find it and tighten the bolt. A torque wrench is a great tool to help ensure that your bolts are tight enough, without doing any damage. 

A person cleaning and oiling a mountain bike chain and gear with oil spray Photo: Ronstik

DON’T: Assume Your Brakes Are Still Fine

As much as we love moving on our bikes, stopping is even more important. Periodically throughout the course of a season, or after leaving your bike sitting for a while, check to make sure that your brakes are still engaging effectively. 

If you have rim brakes, your pads will need replacing when the grooves in the rubber, like the tread on a tire, are worn smooth. For disc brakes, you’ll need to replace them when there is only about 25% of the pad left. This can be hard to measure, but an easier way to tell is when you feel your braking power decrease, even as you pull hard on your brake levers, you likely need new pads. 

If your pads aren’t the issue but you still feel like your brakes are underpowered, adjust your brake cables. Most brake cables have “barrel shifters,” small cylinders on your brake cable near your brake lever. To adjust these, simply spin them. Twisting your barrel shifter counter-clockwise, or loosening it, will add tension to your braking cable and give you stronger braking, while tightening the barrel shifter, or turning it clockwise, will relieve some tension from your brake cable and lessen overly sensitive brakes. 

DO: Get the Right Shift

If you have indexed shifters that shift gears with the push of a lever or twist of your handlebars, it is possible to adjust them at home to fix improper shifting that jumps and misses gears. 

Your derailleurs often have their own barrel shifters. The front barrel shifter is usually near the handlebars while the rear barrel shifter will be near your rear derailleur and chainstay. If your chain lags between your thumb shift and when the chain actually moves, loosen the barrel shifter to add tension. If it jumps on its own, tighten the barrel shifter to decrease tension.

If your bike isn’t shifting into the proper gear, put your bike in its highest gear (with the chain on the biggest ring in the front and the smallest ring in the back). Find the two screws on your rear derailleur labeled “H” and “L” for high and low. Adjust the H screw so that the chain moves through without clicking against the derailleur, while still being able to shift between the smallest and second-smallest gear.

Shift your bike into the lowest gear (with the chain on the smallest ring in the front and largest ring in the back). Adjust the L screw on the rear derailleur so that it can move from the second-largest gear to the largest easily, without being able to shift past the largest gear into the spokes, while still being able to shift back to the second largest gear. It might take some tinkering and trial and error. 

Finally, with your bike still in its lowest gear, adjust the L screw on the front derailleur so that the inside edge of the derailleur is as close as possible to the chain without touching it. Then, shift your bike into the highest gear once again. Adjust the H screw on your front derailleur until the outside edge of your derailleur is as close to the chain as possible without touching it. (Congratulations, you just did the seemingly impossible task of properly adjusting your shifting.)

DON’T: Let a Bike Sit Unused

Approach your bike with a can-do attitude and try to fix your problems. Do your research, and give it a few attempts. If you still can’t get it, take it to a bike shop. You’ll be no worse off for trying to fix things on your own, and you might just learn a few things if something goes wrong while you’re out on your next ride. 

All articles are for general informational purposes.  Each individual’s needs, preferences, goals and abilities may vary.  Be sure to obtain all appropriate training, expert supervision and/or medical advice before engaging in strenuous or potentially hazardous activity.

MORE STORIES