How To Descend a Hill on Your Bike

Unless you’re pedaling along a riverbed or touring a salt flat, you’re likely to encounter a hill or two on your bike ride.

While most people focus on building fitness and learning good technique for the climb, it’s important to prepare for the descent, too. Here’s how to stay safe and in control when heading downhill, whether it’s on the road or remote backwoods singletrack.

DO: Look where you’re going

Look ahead through turns as you descend, watching for oncoming obstacles. Avoid looking down at your front tire; you won’t have enough time to react to potential hazards ahead.

DON’T: Stare at an obstacle

Avoid “target fixation,” where you stare at an approaching obstacle and ride right into it. Your bike will go where you’re looking. Identify obstacles and navigate past them by focusing on where you want to go, not on what you want to avoid.

DO: Use your body position to adjust your speed

Your brakes aren’t the only thing controlling your speed; your body has a significant effect on your velocity, too. To help slow your descent, become “big” on your bike by pushing your chest up to catch the wind like a sail. To speed up, tuck into an aerodynamic position. Bend your elbows and lower your head over the bike’s stem so that your body cuts through, rather than catches, the air. 

DON’T: Stay in the same gear

As you pick up speed, shift through the gears until you’re on your biggest ring in the front and your smallest ring in the back. When you run out of gears and your legs just spin without propelling you any faster, rely on body position to add any more speed. Be ready to shift back down when you approach slight uphills or after slowing down.

DO: Keep it straight when the road or trail gets messy

When you encounter slippery road or trail conditions, like mud, sand, or wet leaves, try to go straight through them, with your bike upright. If you have to turn through a slippery area, aggressively slow down before you reach the low-friction surface.

DON’T: Stay on the hoods

If you have drop handlebars, put your hands on the bottom portion of the bars. This will lower your center of gravity, give you better control, and allow you easier access to the brakes—especially if you need to pull them hard. Regardless of the type of handlebars you have, grip them but always keep two fingers over your brake levers. That way, you won’t need to adjust your positioning to slow down.

DO: Ready your feet 

When you aren’t pedaling in a descent, keep your feet in an athletic “ready position.” Keep your crank arms parallel to the ground, with your heels dropped behind your pedals. This will help keep your weight centered while braking.

DON’T: Lean way back

It can be tempting to throw your weight back while descending—don’t do it. Your front brake has the strongest stopping power, and for it to be effective, there must be some weight over the front wheel. As you descend, keep your weight balanced equally over your front and rear tires.

DO: Relax

Having a death grip on your bars will not only fatigue you, it will make every small bump rattle through your body. That can be dangerous, too: If you are exceedingly stiff, these bumps might cause your bike to veer off course. While maintaining a firm grip, keep your hands, arms, and elbows somewhat relaxed so you can absorb these small shocks.

DON’T: Brake in turns

Trying to slow down in a turn can reduce your tires’ traction and cause you to slip out and crash. Instead, do your braking before a turn, while the bike is standing upright. 

DO: Adjust your body in a turn

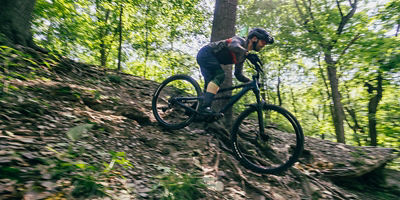
Dip your inside shoulder into the turn and adjust your pedals so that your outside leg is straight, with the pedal as close to the ground as it can be. Press your weight into your outside pedal to increase traction in the turn. 

DON’T: Blast through the middle of a turn

If you’re on the road, and if it’s safe to do so with road conditions and traffic, start your turn wide and aim for the turn’s inside edge, or apex, to make the curve shallower. Once you’re past the apex, look through the rest of the turn for any obstacles in your exit. If you’re moving through multiple consecutive turns, aim for the next turn’s apex as you exit the last. Similarly, on a mountain bike trail, start turns wide, aim for your inside edge, and look through your exit.

DO: Adjust for the weather

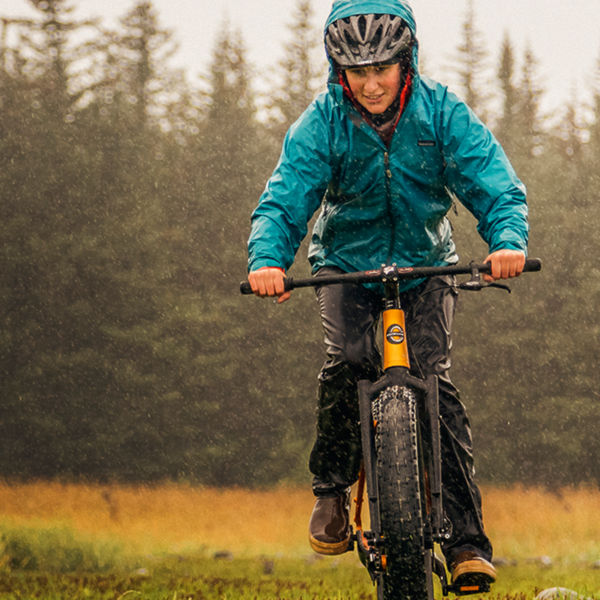
In wet or slippery conditions, brake earlier, brake progressively (see below), and allow more space between riders.

DON’T: Ride the brakes

Ignore the urge to keep slight, constant pressure on the brakes throughout the entire descent; this can overheat your brakes, making them less effective and, in extreme cases, result in a tire blow-out (the heat from rim brakes can expand the air in your inner tubes to dangerous pressure levels). Brake only when necessary and “feather” them by tapping the brakes rapidly rather than holding them continuously. In addition, brake progressively by starting with a soft pull and gradually adding pressure. 

DO: Be courteous 

Unless the trail is designated downhill only, keep your eyes out for uphill bikers. While you’re riding gravity down, they’re working hard to get uphill, so yield to them. Move to the side of the trail, or stop and step off the trail entirely in particularly narrow sections.

All articles are for general informational purposes.  Each individual’s needs, preferences, goals and abilities may vary.  Be sure to obtain all appropriate training, expert supervision and/or medical advice before engaging in strenuous or potentially hazardous activity.

MORE STORIES