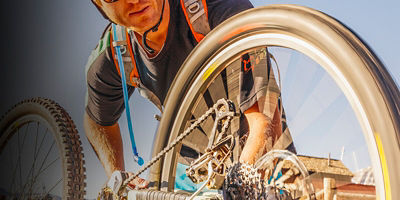
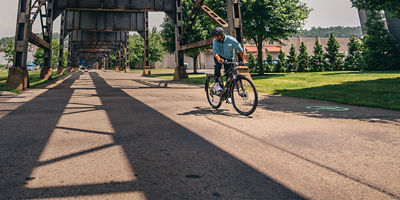
A man rides his mountain bike at dusk with a bike light

How To Choose the Right Bike Light

Photo:Maksym Protsenko

ILLUMINATING THE ROUTE AHEAD IS AN OBVIOUS BENEFIT, WHILE ALERTING DRIVERS AT ALL HOURS AND IN INCLEMENT WEATHER PROVIDES ADDED SAFETY. 

Whether you’re extending your season, riding beyond daylight hours, or simply wanting drivers to see you on the road, adding a light (or two) is only logical. Illuminating the route ahead is an obvious benefit, while alerting drivers at all hours and in inclement weather provides added safety. Most bike commuters typically go with a white front light, and a red rear light. While they’re a safe-riding essential (and legal necessity for riding at night in some states), finding the best type of bike light can be a hassle; here’s how to find the perfect set.

First, Ask Yourself These Questions

Where will I be riding my bike? 

Are you going to be in well-lit urban areas, country roads, off-road paths? The places you ride will dictate what kind of light you need—especially in deciding if your main concern is illuminating the road ahead, or just alerting others that you’re on the road. 

Can I leave them on my bike?

In some areas, things not locked onto a bike may not be there when you get back. If that sounds like where you live, you’ll want lights that are easy to put on and take off your bike.

Will I remember to charge them?

Rechargeable lights are great, but you have to charge them. For the forgetful, having something that is always ready to turn on, until it eventually needs a new battery, is a better option.

What is my budget?

Bike lights come in all sizes, styles and price ranges, decide how much your illumination is worth, and stick to your budget.

Styles

There are two main styles of bike lights: those meant to help you see, and those meant to help you be seen.

Designed To See

Bike lights designed to help you see are impressively bright, medium to large in size, and rechargeable. These often come with high lumen ratings, which is a measure of the intensity of the light emitted, ranging from 100-200 into the 1000s. On city streets, lights around 200 lumens usually work great, on dark trails, look for lights near 1000, while on country roads you’ll usually be well served around 500-600 lumens. 

Designed To Be Seen

Not intended to illuminate the road surface ahead, but rather to catch the eyes of other road users, these bike lights often have low lumen output, are relatively small, and come with rechargeable or small batteries. Often on the less expensive end, some cyclists will leave them on their bike at all times as a backup light. Having these lights stolen is a smaller hit than the theft of more premium high-output lights. 

Beam Shapes

To gauge illumination, consider the light’s “shape” in terms of how the beam hits the road surface: broad vs. narrow and focused. The width of the beam angle determines your field of clear vision, and, in combination with your lumens, how brightly it will be lit (referred to as lux). If two lights have the same lumens, for instance, but one has a smaller beam angle, its lux will be likely higher than a light with broader beam angle.

Road cyclists and urban bike commuters often enjoy a narrower beam angle that provides bright illumination of what’s coming down the road directly ahead. Cyclists riding dirt trails or even mountain bikers on singletrack will benefit from a far broader beam that illuminates nearby obstacles to each side, upcoming turns, and any nocturnal creatures that might wander across the trail. To keep the lux high, these lights often have incredibly high lumens, even in the 1000s so that the broad area where the light falls is still illuminated brightly.

A man rides his mountain bike at dusk with a bike light Photo:Maksym Protsenko

Power

Either plug your lights in each night, or replace the batteries when they die.

Rechargeable 

The benefit of rechargeable bike lights is reuse, over and over again without disposal. They’re also often capable of high output, thanks to advancements in high-capacity lithium ion batteries and highly efficient, and bright, LED lights, with many including a battery level indicator. These aren’t the dim yellow lights of your childhood. The downside is the need to remove and charge them when battery life runs out. Otherwise, you may get caught needing a bike light only to realize you’ve forgotten to charge it.

Battery Powered

These are often smaller lights, used to “be seen” and increase your overall visibility, which run off of small disposable batteries like you might find in a watch or small device. If you opt for these cheaper, smaller, dimmer lights, make sure you can get the batteries easily replaced when they die. You don’t want to find out a new set of batteries costs more than your whole light.

Managing Your Power

It’s possible to get both styles of lights with varying brightness settings. A light with adjustable brightness provides enough of a beam to see what you need, while giving you a dimming option to save battery life. This way, if your battery is dying, you can make your “to see” light into a “to be seen” light, for safety from cars, at the very least. Make sure to check a light’s “burn time,” indicating how long a fully charged light should run, even in multiple settings.

Lights with longer burn times can illuminate longer rides with the added length between charges, but they often come at a higher cost, and sometimes a higher weight. Some riders may even opt for lights with external battery packs that mount to the bike frame with a wire lead to the light head. These are great for tourers who don’t know where they’ll find the next charge, or those who will ride straight through the night, like endurance travelers or evening messengers, willing to compromise weight for the added demands.

Mounting

Most bike lights mount to the bike with a simple rubber strap that wraps around your handlebars or seat post and attaches to itself. These are easy to use and remove in a jiffy so that you can bring your lights with you in case you are worried about them getting nicked. 

Larger bike headlights sometimes use a ratchet strap, like a zip-tie that you can undo. These more robust attachments are great for larger, heavier lights that are more likely to shake loose from a pothole or trail bump if they are insufficiently attached. 

Some lights also have clamps or clips that allow you to attach your lights, especially a rear safety light, to your pocket, bag or helmet. And speaking of helmets, other bike lights attach to the front of your helmet to illuminate exactly where your head is pointed—ideal for mountain bikers who look through turns. These types of riders will often opt for both a handlebar-mounted light, and a helmet-mounted light to illuminate a wide view plus a more targeted spotlight where they’re headed. 

Get the Light For the Weather

Most bike lights will at least be weather-resistant, or weather-proof, prepared for rain on the ride home. These lights are often not waterproof, but so long as you don’t submerge them in water for an extended period of time they should still work. For the nastiest conditions, you can spend more for lights with added degrees of weather protection.

Light ‘Em if You Got ‘Em

Find the right lights for you, charge them up, and get out there. There is plenty of riding to do, and whether you are running your lights in the daytime to stick out more to drivers, or illuminating the road under a new moon, be prepared, and have fun.

All articles are for general informational purposes.  Each individual’s needs, preferences, goals and abilities may vary.  Be sure to obtain all appropriate training, expert supervision and/or medical advice before engaging in strenuous or potentially hazardous activity.