Winter camping at Glacier Point in Yosemite National Park.

How To Go Winter Camping

Photo: Jason Hatfield/Tandemstock

Enjoy the quiet season outdoors—here’s how.

The outdoors is open year-round, so make the most of it by learning how to camp in winter. True, it’s not as easy as camping in other seasons, but in return you get unmatched rewards: snow-hushed wilderness, beautiful winterscapes, and total solitude in even the most popular summer destinations.

Winter camping does require skill and planning, though, to stay comfortable in colder temperatures and stay safe in changing conditions. Here’s what you need to know to extend your camping season year-round.

In this article, you’ll learn:

  • How to plan a successful winter camping trip
  • What essential gear to pack
  • How to pitch a tent in the snow
  • Tricks for staying warm

Planning and Preparation

A successful winter camping trip starts well before you leave home.

  • Finding a site: Developed car campgrounds, pullouts on public land, and the backcountry are all great options for a winter campsite. But keep in mind that many campgrounds close in the winter or shut down services like running water or bathrooms. Also be mindful that many backcountry roads (like Forest Service roads) aren’t plowed in the winter, so you might not be able to drive right up to your favorite summer spot. Research your options so you know what to expect.
  • If you’re new to winter camping, start with a car campsite close enough to civilization that you can bail if something goes wrong. Car camping also makes it easier to pack cold-weather gear.
  • Look for a campsite that’s close to a source of non-frozen water—it’s much easier to get water from an open lake or running river than to melt snow.
  • Check the weather forecast carefully. You’ll need to be prepared for the expected nighttime lows and any chance of storms. Also call rangers at the relevant land management area for current conditions at your campsite. Reschedule if the weather looks worse than you’re prepared for.
  • Finally, look for a campsite that has good eastern exposure. You’ll appreciate catching the first rays of sun on an icy morning.
A person looks outside their tent in the winter Photo: Mumemories/Tandemstock

Gearing Up

Winter camping requires gear that’s up to the task. Make sure you have:

Tent

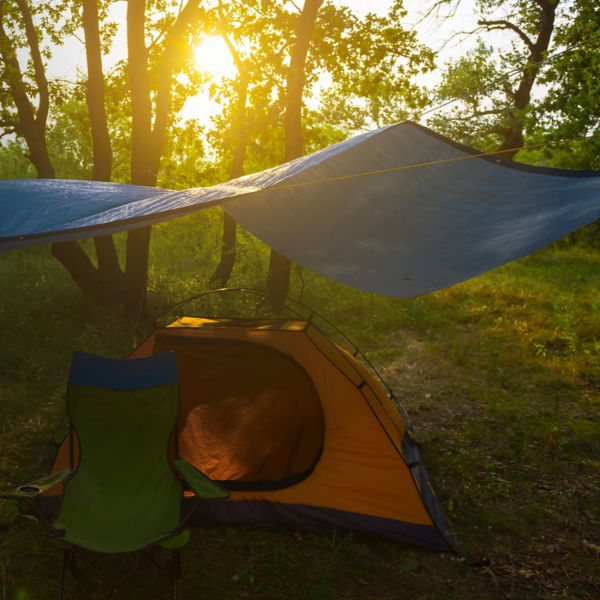
You’ll need a sturdy tent—a three-season model will work in moderate winter conditions (light winds, light snowfall). But for more extreme winter weather, pack a winter or mountaineering tent that can withstand high winds and heavy snowfall. If you want to test the waters, rent a winter tent for your first trip.

Sleeping Bag and Pad

Pack a sleeping bag that’s rated to at least 10 degrees below the lows you expect (this is also a good option for renting). Sufficient insulation from the cold ground is critical. Some pads are made for winter, but using two sleeping pads also works well. Lay down a closed-cell foam pad first, then a thick inflatable pad on top.

Apparel

Warm layers are key. Start with a cozy baselayer top and bottom, a warm midlayer, an insulated parka with a hood, and a waterproof shell jacket. On the bottom, softshell pants are great for their added weather resistance. Make sure you have a warm hat, gloves or mittens, a neck gaiter, and thick socks. Waterproof winter boots are essential for snowy conditions, and insulated booties are a welcome luxury when you’re in your tent.

Don’t forget to protect yourself from the sun with sunglasses, a sun hat, and sunblock, too. Snow can reflect the sun’s rays, intensifying exposure. And boot gaiters are must-haves in deep snow to keep your feet dry.

Stove and Fuel

In frigid temperatures, use a liquid fuel stove or a stove and fuel canisters designed for subfreezing temps. Pack more fuel than you would on a summer trip, as you’ll likely make more hot drinks than usual. If you can’t find any running water near camp (and you can’t pack your own), you’ll need to melt snow for water. In that case, pack lots of extra fuel—about three times what you’d use in summer—and a large pot.

Accessories

Bring a few light sources and extra batteries; nights are long in winter, and a fully charged headlamp plus a lantern make all the difference. A lightweight, compact shovel is handy for digging out a kitchen area or making snow furniture. Finally, diversions like books, games, and cards make huddling up in your sleeping bag that much more fun.

Pitching Your Tent

You might be able to pitch your shelter the same way you do in the summer, if the ground is dry or covered only with a light layer of snow. But here’s how to set up a tent in deep snow.

First, stomp out a flat platform larger than your tent’s floor area with boots, snowshoes, or skis. Next, think about anchoring the tent—regular tent stakes won’t work in the snow. You can use specialized snow stakes, or tie off your tent to “deadman” anchors. These are buried objects that keep your tent secure: think long sticks, ski poles, or snow-filled stuff sacks. Dig trenches for the deadmen, tie off the tent corners to them, then bury them. Wait until your platform has hardened a bit to pitch the tent and stomp snow on top of the deadmen.

Staying Warm

These tricks will help keep the chill away.

  • Keep your body’s furnace humming with plenty of food and liquids. Hot tea or cocoa is an especially appealing way to stay hydrated. This is not the time to count calories.
  • Keep a midnight snack handy in case you wake up cold. Eating a candy bar or gel packets will give you a shot of warmth.
  • Bring a hot-water bottle to bed with you and place it by your feet, groin, or armpit for the most efficient warming.
  • Layer up to sleep: Get in warm baselayers and thick socks to start. If you’re still cold, add booties, a midlayer or even a puffy jacket, hat, and gloves.
  • Get your blood moving. Do a round of sit-ups, jumping jacks, or push-ups right before you crawl into your sleeping bag or anytime you feel chilled.

All articles are for general informational purposes.  Each individual’s needs, preferences, goals and abilities may vary.  Be sure to obtain all appropriate training, expert supervision and/or medical advice before engaging in strenuous or potentially hazardous activity.

MORE STORIES